Showing posts with label power tools required. Show all posts

Wednesday, September 23, 2015

Breakfast Nook

I really like the farmhouse style/JoAnna Gaines type kitchens. You know what I mean? Think wooden floors, white subway tile, farmhouse tables and lots of beadboard. But making a breakfast nook of our own was one thing that kept getting placed on the back burner. Probably because we're amateurs who have real day jobs and do not have ton of money to just toss around! But at a slow steady pace, Andrew & I have been working on transforming our house, and in a lot of ways we are getting closer to the "look" we like want… 
  • The kitchen cabinets were painted white. Check. 
  • We added breadboard to them. Check. 
  • The dining room got board & batten. Check. 
  • The fireplace got a facelift. Check. 
  • Flooring is done. Check. 

It seemed that all we had remaining was to figure out how to make our nook bench. 
Well folks, we finally made it & here's how it all went down.


There are several ways to get the bench. Build it from scratch, turn an Ikea bookshelf on its side, use old church pews, etc. I decided we would make ours out of kitchen cabinets. {What can I say, I wanted the extra storage!} So I bought two builder-grade oak cabinets from Lowe's. For a long time, they just sat in our basement and we doubted if this was a project we would ever accomplish.  Then earlier this month, Andrew had a night where he was REALLY inspired, and he just started going to town on it. Turns out this one wasn't the headache we feared it would be. We had everything built in 2 nights, I took 3 days to paint it, and then all we had to do was order cushions & charrs for the other side of the farmhouse table.


We removed the baseboards and measured where we wanted the bench to be on the wall. Then we added a frame to the back {between the wall & cabinets} so the bench wouldn't be so narrow. Next Andrew devised a way to attach the bench to the wall using L-brackets cleverly hidden under the baseboards. He's a gem! The last part of construction was securing a large piece of plywood to the top with the air nailer & putting the beadboard on the sides to match the kitchen cabinetry. Things were looking good!

Then I painted. I used my old stand-by Valspar Bonding Primer. Things were now looking super good! The end was in sight! After everything dried, I caulked the cracks and we accessorized.
A sidenote about our "accessories"… The cushion is from Pottery Barn. Andrew found it online and we were jazzed because it had the same dimensions of our bench. Weirdly, the thing came and it was 2.5 inches narrower (is that a word?) than advertised. So PB sent me another just to be sure mine wasn't a defect… replacement cushion was wrong too. We decided to just keep it & added the board & batten to the back of our bench to compensate the missing inches. We're both in love with this detail now, so evidently it was all a blessing in disguise. Next fun challenge - the chairs are from Restoration Hardware, and we had to send several back because they kept arriving broken. So who even knows if they will be durable enough to stand the test of time. For now they look cute and hey, they were on sale. So whatta ya gonna do! 
So with the bench built, board and batten add-on, cushion/pillows, table/chairs in place…we are ready to use this bad boy! Icing on the cake will be to find a cool silver lantern to hang instead of the current light. We're in no rush. Thanks so much for checking in to see what's new with us. I've been a bad blogger. I would say you should check back soon for more frequent posts, but who are we kidding!

Keep creating out there, people!

Thursday, April 9, 2015

DIY Ironing Board Rack

Hello out there - long time, no post! Since you last checked in, we finished laying the flooring in the kitchen and I've been busy painting all the trim white. I also repainted the walls & cabinetry in the little bathroom across from the pantry. Pretty soon the kitchen zone will be finished, and we'll move on to the dining room…which will hopefully be a snap since it's a square room. Time will tell!

Today I'm going to share a quick little project I did to help keep organized in the laundry room.

IRONING BOARD RACK

Supplies:

  • 2 hooks
  • 1 chunk of wood
  • paint
  • screws
  • stud finder
  • power drill
  • right angle/level

STEPS

I completed this project in 1 afternoon using a remnant piece of wood from a previous project & hooks from Lowe's that were $4/ea.

Pre-measure for hook placement. Use a right angle to make sure your marks are level.

Find the middle of your wood backing and mark holes top center and bottom center. These will screw into a stud in your wall. Drill your holes. Use a bit that is slightly smaller than the size of your screws.

Paint {and prime if necessary} your wood and let dry.

After locating a stud with the stud finder, draw a pencil line on the wall & line up your pre-drilled screw holes. Power drill into the stud, then screw the hooks into their pre-drilled holes.

Check to make sure it's level, then hang your ironing board. Tad-da! All done and under $10!

Thanks for stopping by Old Elm today.
Keep creating, DIYers!

Tuesday, February 24, 2015

Faux Mudroom How-To


Today was a really productive day! Using the beadboard we had leftover from refacing the sides of our kitchen cabinets, we created a "mudroom" across from our garage entry door. The space isn't big enough for a full on mudroom {i.e. no bench for extra storage} but I came up with this idea and we achieved a similar look. We'll still use the space the same way, but now it flows into the kitchen & matches really nicely. Here's how it came to be:


First we removed the old coat rack, cut the bead board to fit the space and nailed it into place. 
This took a little extra work - Andrew used a Dremel with a sanding bit to get the fit just right.


Next we devised a three piece shelf, cut our wood to size, and nailed it into place. 
{We used pine from Lowe's} I wanted the shelf to be deep enough to withstand light-weight decorations.


Last, I primed/caulked/painted and reinstalled the hooks from the old rack. Ta-da! You can see the little transformation in the photos above. Notice the flooring {or lack thereof} in the righthand photo…We are so close to installing our new Pergo & can't wait to see how that unifies all of the rooms it flows throughout. Stay tuned!
Keep creating, DIYers!

Saturday, January 17, 2015

How Far We've Come

Well, the painting is over for a while. And the microwave is installed. With so much more to do, sometimes I forget how far we've come. I've tried to take pictures along the way to help jog my memory. Speaking of photos - I'm totally amateur. I envy other blogs with super crisp, flawless images. {You will not find such things here.} Okay, on to the mediocre photos.


The new shelf sits on L-brackets that are bolted to the adjacent cabinets. The microwave is attached to the shelf with screws. The microwave is also supported from behind by a steel brace that's been screwed into the studs. Andrew did a great job on converting the outlet, fitting the shelf & drilling holes for the electric. The cord for the microwave comes up through a hole in the shelf and plugs into the new outlet.

Here is what the outlet situation looks like:


The island is finally put back together, too. Remember, the flooring and counters still need addressed. Currently I'm just happy that all the crap on the counter in the lefthand picture is no longer in existence. {That stash makes us look like contenders for a hoarder show. Geeze} It's been replaced by our collection of cookbooks.


Let's see…what else? Oh yeah, this light! Here's a shot of our light above the sink:


That about sums things up for now. Today while I was at work, Andrew got subway tile samples at Lowe's. I was worried about the whites not looking right together. White is just about the dumbest paint color family because there are 1,958,711,245,987,902 versions. Matching can become very overwhelming. Or not even matching…just trying to make sure things don't clash. As luck would have it, the samples look great & Andrew is happy because they get good reviews online. High-fives all around.

Thanks for stopping by Old Elm today, you were lovely virtual house guests.

PS: While the paint was out, I kept having these 'why the heck not!' thoughts. 
As a result, here is a mini-transformation of my antique library table:

Wednesday, December 3, 2014

Fireplace Facelift


This is how we gave our builder-grade oak fireplace an amazing facelift for under $200:
  1. Plan. Measure from the mantle to the ceiling for the 4 vertical beams. Take 1 horizontal measurement for the top. 
  2. Purchase. Take your measurements to the hardware store and buy your wood. I got plain oak 1x3 beams at Lowe's for $10-$15/each. {Truthfully, I did this backwards. I bought my wood and then measured when I got back home. It was an impulse buy that paid off!}
  3. Prep. Throw down a drop cloth. Cut your wood pieces to size and nail them into place. Andrew did this with the air nailer. I patched the indentations with wood filler. Now prime - I used Valspar Bonding Primer {You don't even need to sand!}
  4. Paint. Tape off & get to work. I gave the fireplace two coats of "Dove White" satin finish.


The paint instantly transformed things. I did it on my day off while Andrew was at work. When he came home, he was impressed. To spice things up, we wanted to add AirStone to the fireplace surround. AirStone comes in three colors. We chose Stone Creek which is a mixture of light & dark grays, and applied it directly on to the existing tile surround.

This part was the most difficult portion of the project. The stone pieces come in various rectangular and squared off sizes, and the box states that you can cut them to size easily with a hack saw. No sweat. Well, it was actually A LOT OF SWEAT. Poor Andrew. I was the foreman of this job and gave him the pieces with measured notches on them, and he had to do the cutting. He probably needs a new rotator cuff now.

Once the stones were cut to size, I used the adhesive cement and applied the pieces. We ended up having to buy two boxes at $26/each. {One box covers 6 sq. feet} We used one entirely & just a few from the other box. I guess we can save the extra and maybe find a purpose for it somewhere down the line.

We are really pleased with the final facelift, and how much character it adds to the family room. Even though the stone was harder to cut than we originally thought it would be, we were still able to get this project done relatively quickly. I wanted the fireplace to be finished in time for Christmas, and we achieved that goal. The paint worked really well, so I plan to take it around the house and paint all of the oak trim, window casings & stair banisters. Which I'm sure will take an eternity…


Thanks for reading about our latest project!

PS: Wondering what happened to the mirror that used to hang over the mantle? We relocated it to our bedroom. It now hangs above our bed and we think it looks top-notch.

Sunday, November 16, 2014

Our New Deck


 The deck is finally complete. We capped the 4x4 posts, took some photos, and thought about how great next summer will be when we get to sit back & enjoy all of the backyard renovations. 


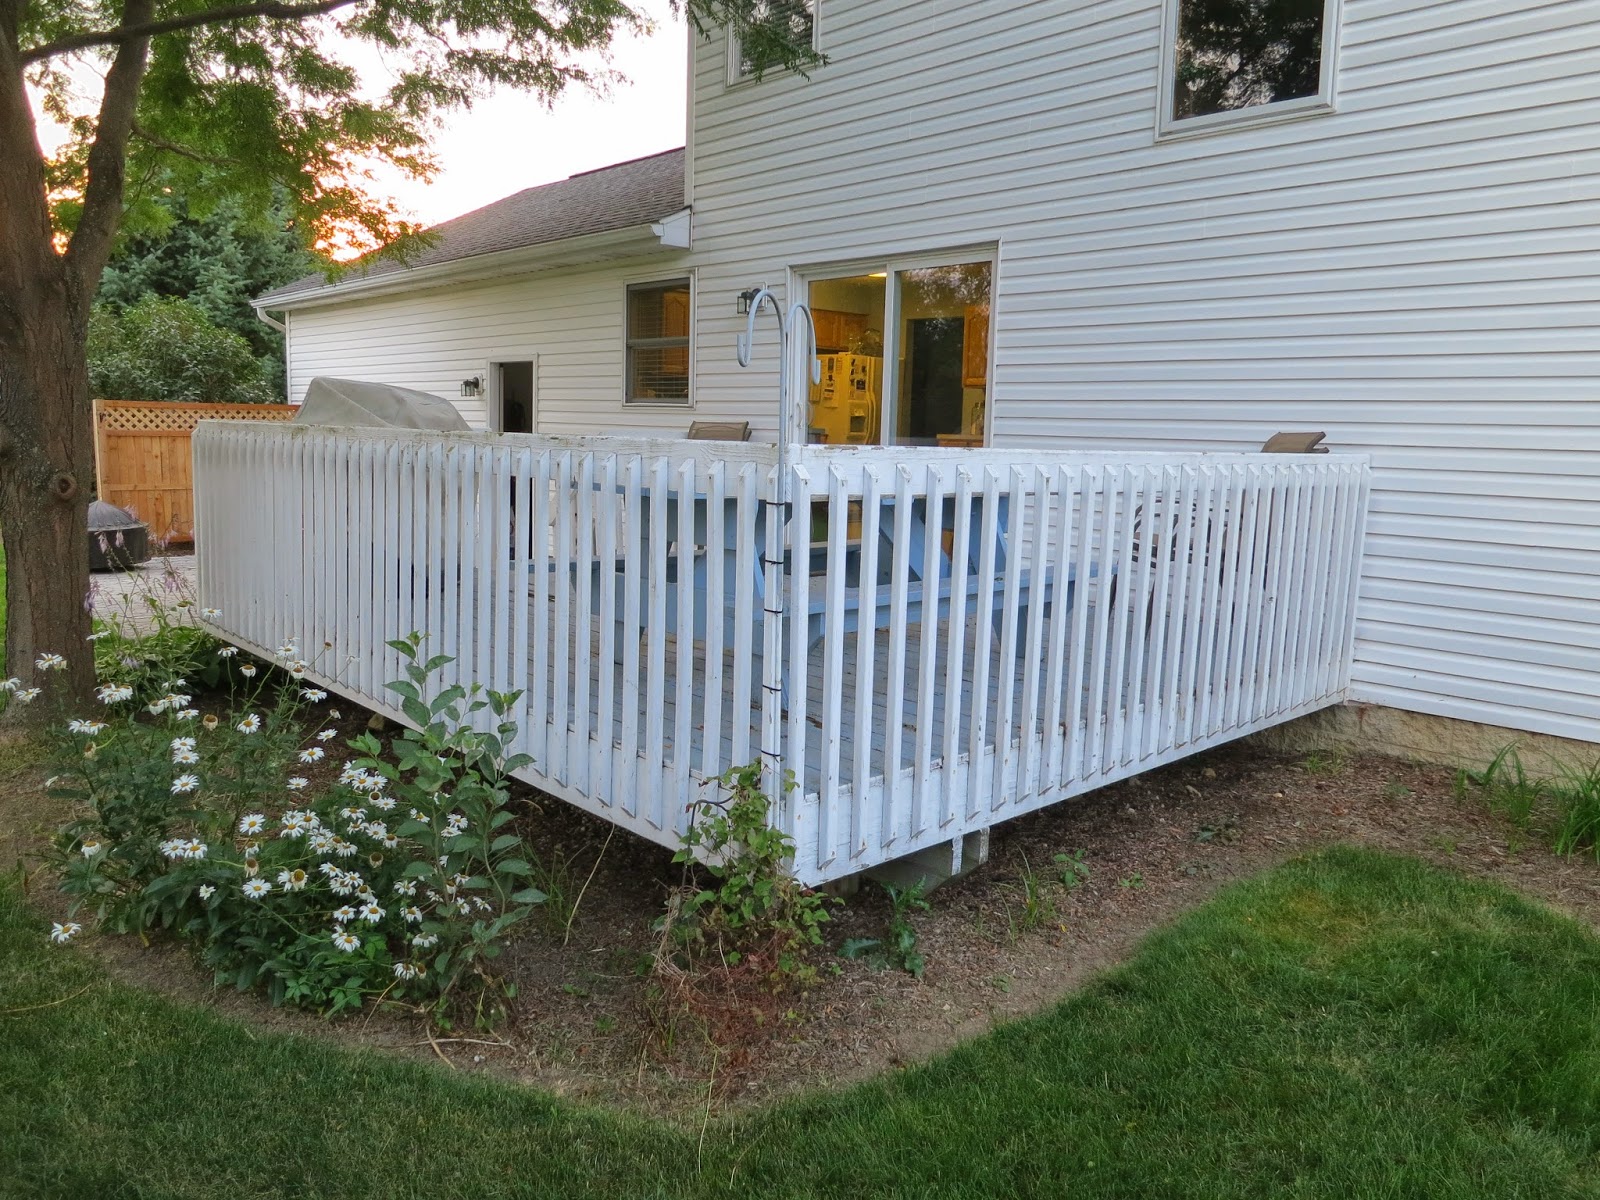
To refresh your memory, this is what the previous deck looked like:

Thursday, September 4, 2014

Phase III - The Rebuilding Process

Can we all just take a minute to appreciate the fact that rebuilding a deck is hard? Maybe not if you are in construction by trade...but hard for a biologist (Andrew) and a nurse (me). But that will not stop Team Farber! I'm a sucker for doing things myself and so is Andrew. It takes a lot for us to want to wave the white flag & pay a professional. Sure, we'll gripe a little along the way if the project isn't coming together as envisioned. But fact of the matter is, we love the feeling of admiring the finished product we made with our own two (four?) hands {and the hands of others who pitch in. Fist pump for the pitcher-inners!}


Andrew & I originally set out this summer to completely renovate the back yard. We built and planted a raised garden bed, leveled earth and laid a paver patio, and last but not least: THE DECK. So here we are in September, with Fall peeking right around the corner...and we basically blew our original deadline. Yep. Blew it. But are we 80% finished? Heck yes we are.

Things have been kind of weird & unpredictable this summer with regard to inclement weather. Rain kept pushing work on the deck back a day...back a day...back a day. Well summer is made of days, and we started running out! Additionally, we like to get off the property every once and a while for date nights, baseball games, mini-golfing, ice cream runs, bonfires & cookouts with friends. Those are all crucial parts of summer, too.

Luckily, we did some major damage on the deck over the three-day Labor Day weekend. The deck boards and 4x4 posts were already in place. Andrew and I spent the majority of Monday building the railings. 11 sections with 6-7 spindles each. At the end of the day, his wrist was numb from drilling and my thighs were burning from squatting & holding wood plumb with the level. But we felt totally accomplished & went out for celebratory wine and eats at Gervasi!

Everything is coming together and looking even better than we had hoped. All that remains is installing the railings and adding the two sets of stairs. The end of the Farber Backyard Update is in sight. When we're totally finished, we want to have a big bash to celebrate our new outdoor spaces.It will be nice to sit back and appreciate all of the hard work!

Thanks for reading!

Monday, July 28, 2014

Phase III- Deck Demo

The last portion of our "backyard renovation" is replacing our deck. The current deck measures 12 x 16 feet and has one set of stairs on the side closest to our paver patio. The deck is probably as old as the house, and the previous owners had it painted blue and white. After this past winter, followed by a rainy Spring and Summer, it was showing considerable wear. We're going to replace the boards, add a second staircase, and go with a slightly different style of railing. It will still be 12 x 16.

With the help of Andrew's dad, we tore up the deck on Saturday morning. The underlying frame is still in great condition, and since it doesn't experience weathering like the top, we are choosing to keep it. The guys used crowbars to pry up the boards and I hauled them to the trailer. The process was pretty quick - it only took us 3 hours. The most tedious part was pulling the old nails out of the frame with pliers. We plan to buy lumbar and get building within the next two weeks. Here are some pictures of the old deck: