Showing posts with label gifts to give. Show all posts

Saturday, December 12, 2015

DIY Bath Bombs

Hi guys! 

Today we're making Bath Bombs.


These are great for gifting AND personal use...because if you're anything like me, you love a nice warm bath in the winter months. If you're looking for a simple gift that's low cost but high impact, give these a try.

Let's get started with the list of supplies you'll need:
    • 1/2 cup citric acid*
    • 1 cup baking soda
    • 3/4 cup cornstarch
    • 1/4 cup epsom salt
    • food coloring
    • essential oil of your choosing
    • small spray bottle
    • silicon ice cube tray

*If you're having trouble finding citric acid, look in the spice section at your local health food store - it's granulated and comes in a shaker because some use it as a salt substitute. Who knew?!


DIRECTIONS

  1. Dump the citric acid, baking soda, cornstarch and epsom salt into a bowl and stir.
  2. Fill your spray bottle with tap water and some drops of food coloring, as dark as you want it.
  3. Spray the mixture in your bowl and stir. You want the mixture to get clumpy like wet sand. The more you spray the more color you'll get. And if your mixture fizzes a little bit right now, that's okay.
  4. Now add drops of your essential oil - I used peppermint - as many as you like to reach desired smell.
  5. Using a spoon and your hands, press the mixture into your mold. Pack it in hard so your bombs won't crumble upon removal. I used ice cube trays, but muffin tins would work also.
  6. Let your bombs sit over night, then carefully pop them out and package them. Ta-da! This recipe will make 15 bombs using a 3x5 grid silicon ice cube tray. I doubled it to make two colors.

I packaged mine in clear cellophane wrap - if you use a jar, poke an air hole in the top because the bombs like a little bit of air. Another tip: Don't be too rough with them because they are fragile. You want to be sure these get to your bath in one piece for maximum enjoyment!

This year I gave these to my mom & sisters along with homemade body butter and a coffee scrub. I like using beauty products that are free from harmful {or just plain hard to pronounce} ingredients. By making your own, you control the mix-ins, and it's fun!

Keep creating, DIYers!

Friday, December 26, 2014

Couple's Hobby Canvas


I was commissioned to paint this canvas back in September. It was to be given as a Christmas gift, hence the late post! The vision behind this project was to create a collection of the couple's favorite hobbies. Painted with a cream background, burgundy, hunter green & gray lettering, the result is an outdoorsy-themed tribute to a fun & active couple. I hope they got a kick out of it!

Sunday, October 19, 2014

Easy Homemade Caramel


Today is Andrew's birthday! Later on we are having some family over for pumpkin pie & apple cider floats to celebrate. Fall is his favorite season, so I'm glad he has an October birthday {mine is in March, and typically really gross, cold, wet, weather around here!} Today I am thankful that it is crisp and sunny, and I'm thankful for my husband.

For our get-together later on, Andrew's mom is bringing the pie and I'm in charge of the floats. I got vanilla ice cream, ginger ale, apple cider, and whipped cream for them. Should be tasty! Here is the recipe I used to make caramel {which I plan to drizzle on top of the whipped cream}

1 cup heavy whipping cream
1 Tbs. vanilla extract
1/4 tsp salt
1 1/2 cups brown sugar
1 stick butter


I put everything into a saucepan over medium heat until it all melted. Then I brought it to a boil and set the timer for 10 minutes. You're supposed to let it sit for the full 10 minutes without stirring, but with 4 minutes to go I put my rubber spatula in because I was nervous that it would burn on the bottom. Luckily it wasn't burnt! I reduced the heat a little while it cooked, but kept things hot enough to maintain the bubbling. When the timer went off I slowly stirred it with the spatula, then let it cool before transferring it to a jar. Hopefully it will be tasty on the floats. {And good for apple dipping, too!}

Have a good Sunday, DIYers!

Saturday, August 30, 2014

Kid's Bath Sign


Hey everyone! Just popping in quick to share this canvas I did for Andrew's cousin, Tara {that I'm delivering it to her tomorrow at a family cook out, yaaaay!} She plans on hanging it in the kid's bathroom at her house. It turned out pretty well - and hopefully the kids will do as it says…

PS: Putting a votive filled with Q-tips on top of a mason jar filled with cotton balls is a great way to spruce up the bathroom & put those spare jars to use. Try this!


Tuesday, August 5, 2014

Custom Canvas Wedding Announcement


Here are some shots of a custom piece I did - It was given as a bridal shower gift.
The canvas commemorates important "firsts" for the couple: first date, first kiss, the address of their first home, and the date when they will tie the knot and first become MR & MRS. I think it turned out really cute!

Best wishes to the bride & groom!


Friday, August 1, 2014

Seashell Crafting

This summer we went on a family vacation to Holden Beach, NC. The last time we were all able to go as a family was 9 years ago, so I was anxious to get back. We had a great time and collected tons of good shells. My mom and I got together to craft with some of them {we have bags and bags...not kidding when I said a ton!} We made shell garlands and decorated picture frames. I think everything turned out great, and it was fun to reminisce and chat while we worked.

The shell garland is absolutely a $0 Project. Just grab some fishing line and start stringing shells! Keep a loop at the top, or even both ends, for easy hanging. My mom has always loved making these, so we are in the habit of specifically hunting for shells with holes.


For the picture frames... we picked our favorite shells, tiny delicate ones, pieces of coral, drift wood & pretty bits of broken shells. We arranged them in the corners of our frames and secured them in place with my hot glue gun. Now we'll be able to see them on a daily basis and it will remind us of what a fun trip we had. I just need to get around to printing a picture to place inside of mine! 


Thanks for checking in! Keep creating DIYers!

Monday, June 30, 2014

Jelly Jar Citronella Candles


I have been saving Smucker's Orchard's Finest jelly jars {and a few other "cute" jars} for a while to make homemade candles. This month I finally got around to it.

I touched on this project a little in my post about Craft Night, but I wanted to write something more detailed & entirely devoted to the candles. {Detailed... sort of ironic, because making these was anything but!}

You need just a few things to accomplish this:
  • melting wax
  • citronella essential oil
  • wicks
  • jars/containers
I bought soy wax shavings from Pat Catan's craft store for $20. The good news to me was the wax is microwaveable. I was dreading buying/using a double boiler. I'm sure it gets the job done just fine. But for whatever reason I had a mental block against it. I hot glued the wicks into my jars. {Regular and wood for fun!} Then microwaved my wax in a liquid measure. I added the drops of citronella oil after the wax came out of the microwave. I thought maybe the wax would try to harden right away, but it stayed liquid-y for a while. In fact, after pouring it into my jars, it took a full 24 hours to totally harden. Voila! Done! I made 6 candles and had plenty of wax chips leftover.


So there you go. A fast, fun project - cheaper than store-bought and in my opinion a lot cuter. I chose to leave my wax it's natural color, but it would also be fun to experiment with different colors.

Thanks for checking in at Operation: Old Elm!
Keep creating!

Wednesday, June 18, 2014

Craft Night!


This past Friday I had one of my oldest friends {since birth!} Nicole over for a girl's craft night. We ordered pizza & went to work on several projects - everything turned out pretty great if we do say so ourselves! We worked on some projects together & some separately, and had an overall great time catching up on life and staying up late like the old days! We made a skirt for the utility sink in my bathroom, homemade citronella candles, mod podge magnets, and painted bottles (not pictured). It was super fun & we look forward to doing it again soon!

Thursday, May 1, 2014

Canvases...lately

Hello readers! Just wanted to quickly share two of my recent paintings. The first is a birth announcement canvas for my friend's daughter:


The second is also for a baby, so I guess it's baby season! Fun fact, my mom is the one who taught me this poem. Although I don't have any kids of my own, I always like passing it along to expectant mothers:

"Cleaning and scrubbing can wait 'til tomorrow
for babies grow up, we've learned to our sorrow.
So quiet down cobwebs, and dust go to sleep,
I'm rocking my baby and babies don't keep"

That's all for now. I hope everyone is having a good week!

Wednesday, April 23, 2014

How to Upcycle Glass Jars


Empty jars from jelly, spaghetti sauce, minced garlic, honey, wine... you name it. Whenever I'm washing one out, something snaps inside of me & I save it instead of putting it into our recycling. {Every time!} The way I see it, why waste a good container for a future craft? Today's $0 Project is about how to remove the sticky labels from your jars so you can upcycle them into something new & fun!

up·cy·cle [uhp-sahy-kuhl]
verb (used with object), up·cy·cled, up·cy·cling.
1. to process used goods or waste material so as to produce something that is often better than the original

Fill a sink with hot water & place your bottles/jars in until they're fully submerged. Add 1 Tbsp dish soap, 2 cups vinegar, and 1/2 cup baking powder {powder, not soda}. After the fizzing subsides, the labels should peel right off the glass. I let mine sit for 2 hours while I was out at the store. If the paper comes off but the glue is still there, I resort to Goo Gone to fully remove the residue.


Now that your jars are label-less, here are some upcycling ideas:

SUGAR SCRUB Sugar + dish soap = homemade sugar scrub.  Click here to fill your jar with this simple {but luxurious!} skin exfoliating DIY tutorial by me. You can experiment with different soap scents and try adding essential oils. It really doesn't get any easier than this!

CITRONELLA CANDLES Melt plain or colored {but scentless} wax chips in a heat resistant bowl over a saucepan of boiling water. Add a few drops of citronella essential oil to the wax. Place a wick in your jar, then pour in the wax. Let the wax firm & you have yourself a cute candle that will repel pests on the patio.

MINI TERRARIUM Fill your jar in this order: rocks, charcoal, potting soil. Then add plants, sticks & succulents. The charcoal helps contain moisture and stave off mold. Looking for things to add? Collect from your yard. {No bugs allowed!}

DRINKING GLASSES Fill your sink with cold water. Soak a string of yarn in nail polish remover & tie it around bottle. Light the string on fire & let it burn for about 15 seconds. {Don't burn yourself!} Dip the bottle in the sink, and the glass will split where the yarn was. This is especially fun to do with bottles that have etched or painted labels that are directly on the glass.

SELF WATERING WINE GLASS PLANT Follow the steps above, but save the top piece. Fill the bottom {cup part} with water. Thread some string through the neck of the bottle so that it hangs out both ends. Put your dirt & seeds in the inverted top piece, then place it on the bottom piece {neck will be facing down}. The string will wick the water up & nourish your plant. Just don't forget to replenish the water supply as needed!

STORAGE Andrew has a few jars near his tool bench with spare nuts, bolts, nails, and screws; I have my own collection in the kitchen for chocolate chips, sprinkles & raw sugar for my tea; and there is a jar on our bathroom counter filled with q-tips & cotton balls. Use glass jars to spice up storage of otherwise boring items!

In short, empty jars = endless possibilities. I plan to do a post on each of these ideas in between all of the Spring DIY we have going on around our house {new back patio, deck & landscaping} Stay tuned & Keep creating! 

What are your ideas for upcycling glass containers?

Monday, April 21, 2014

Homemade Sugar Scrub

Mason Jars. You could practically put {anything} inside of one, give it to me & I would be thrilled. There's just something very classic about it. Another thing I really like? A good, old fashioned handmade gift. Whatever it is, you can almost feel the love that went into the making.

A few years ago I gave these out for Christmas. This Easter, I made Homemade Sugar Scrubs for my mom & aunts. The ingredients are basic & the scrubs were a big hit...packaged in mason jars, of course!

  1. Assemble your supplies: mason jar, sugar, dish soap {I'm using Dawn Cucumber Melon}
  2. Fill your jar 3/4 full of sugar, 1/4 with dish soap.
  3. Stir contents {using a butter knife to do this works for me}
  4. If the scrub seems too thin, add more sugar. If it is too thick, add more soap.
  5. Once you have reached a consistency you like, cap it off & you're all done!


This scrub is a great exfoliator! Use it to remove grime after a day working in the garden, as a nice shaving scrub for your legs while in the tub, or simply a daily hand treatment to soften dry skin. Try different dish soaps for varying fragrance & color. For enhanced skin-soothing hydration, add a few drops of olive oil.

Giving your scrub as a gift? Click here for a cute tag!

Happy scrubbing!

Monday, April 7, 2014

Kool Aid Gift Tags


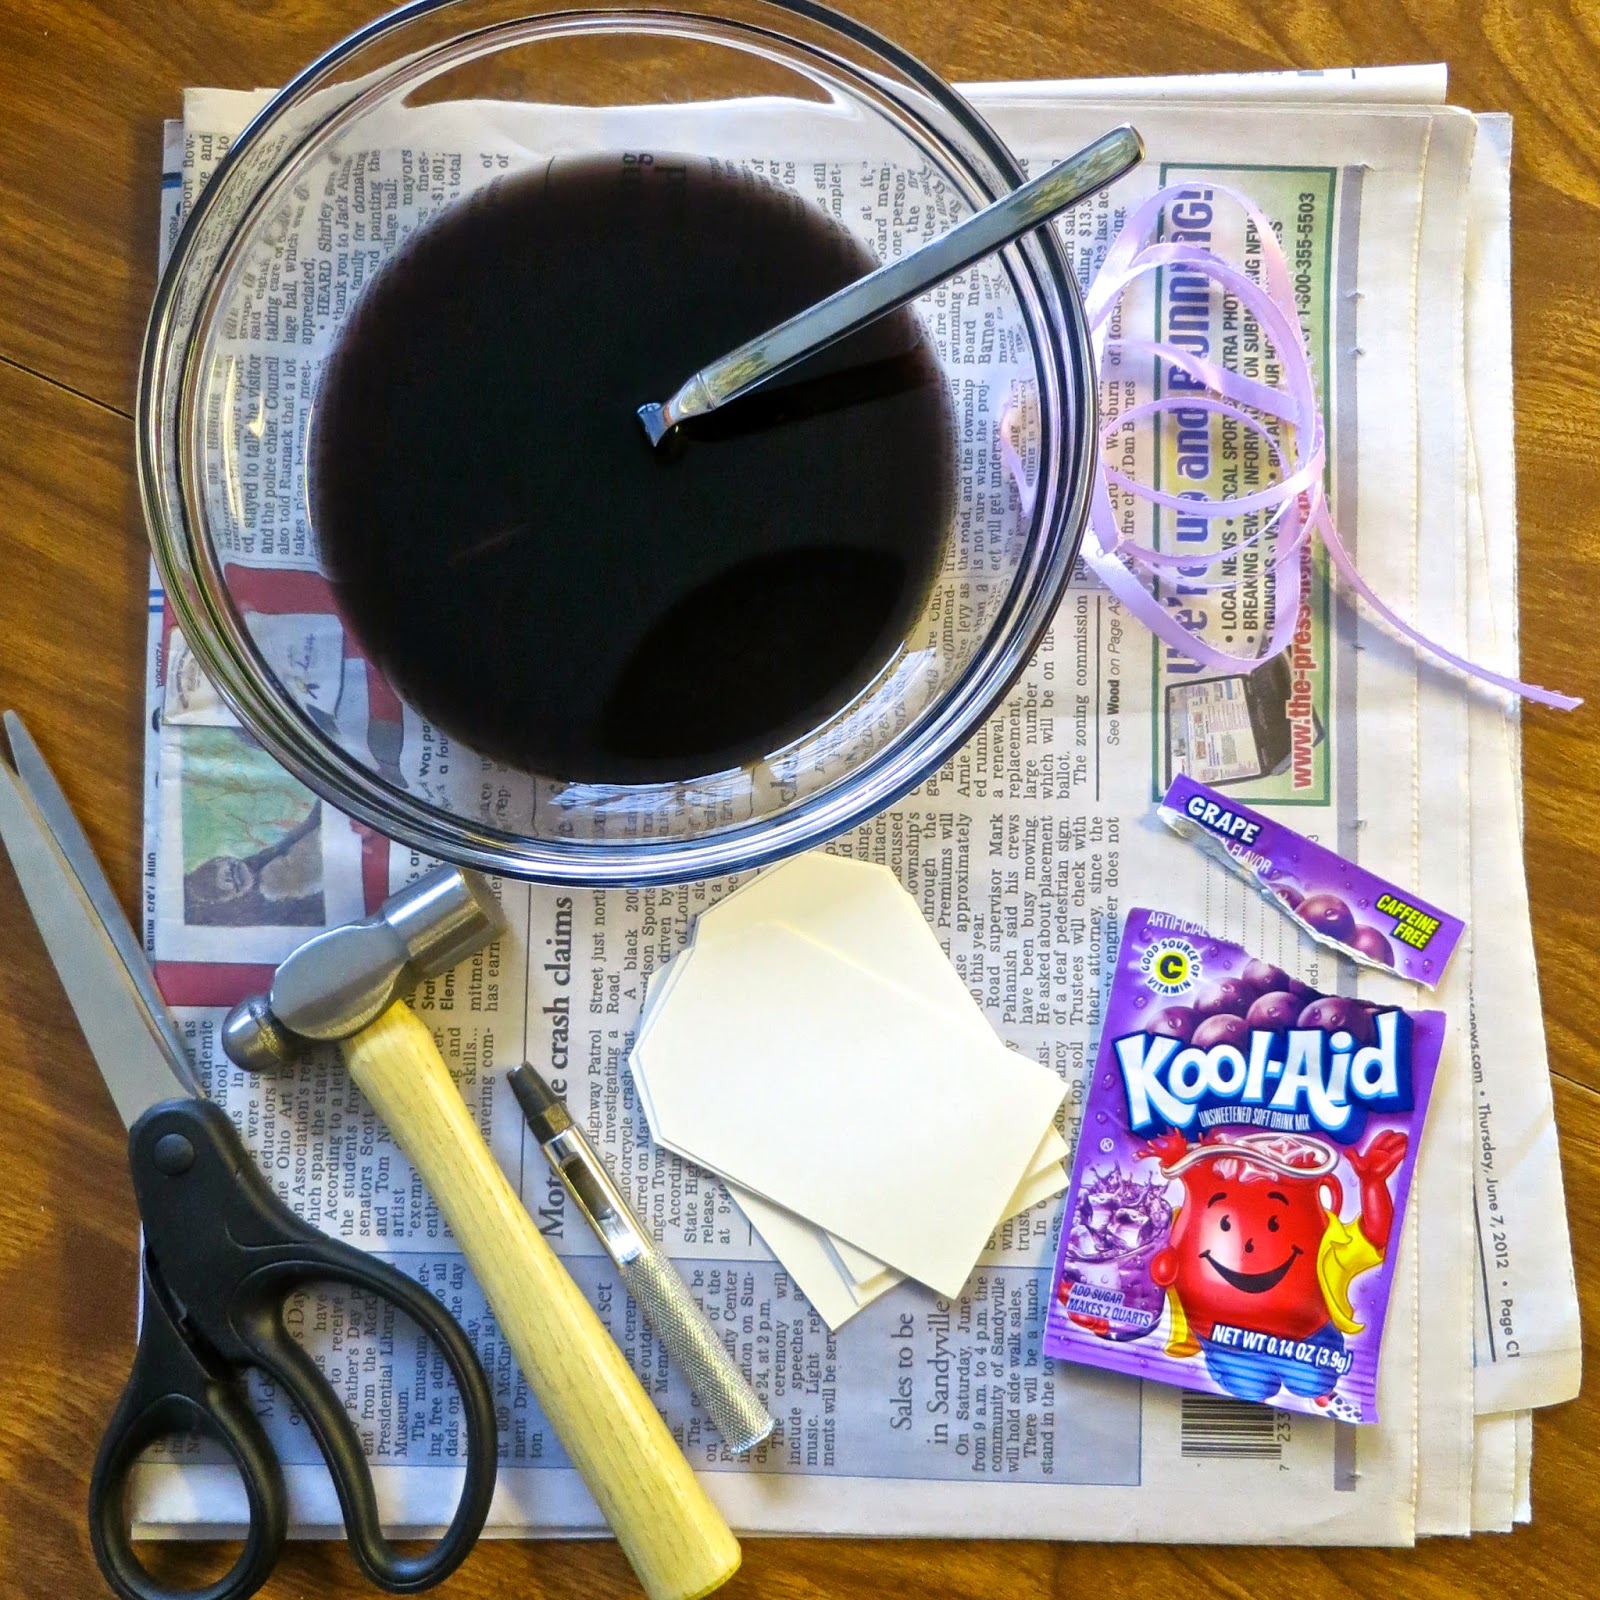
If you have cardstock, ribbon, and packet of Kool Aid... you've got everything you need to make this set of adorable gift tags. No kidding! I used plain cream cardstock cut into 2 x 3 1/4 inch rectangles, looped some purple ribbon through holes I punched in the top, then dipped the bottoms in grape Kool Aid*. Check out pictures of my process below & try it yourself. Have fun experimenting with different flavors colors - they even smell good!


This project took me a total of 30 minutes. At first I was worried because the Kool Aid in the bowl looked too dark, but the color actually went on really light & darkened to a nice shade as it dried. I'm looking forward to using these tags on Easter gifts - the color is perfect for this time of year!

* I didn't add sugar to the Kool Aid {as the package suggests} since I was using it as dye & not a beverage. Just empty one sleeve into a bowl with 6 oz. of tap water
 

He is not here; He is risen, just as He said. 

Matthew 28:6